home aircraft books history links old news quotes soft sounds weather
early electric power gliders helicopter indoor technology future
zagi zagi thl stiletto siesta filip400 simply the best nano floh skorpion
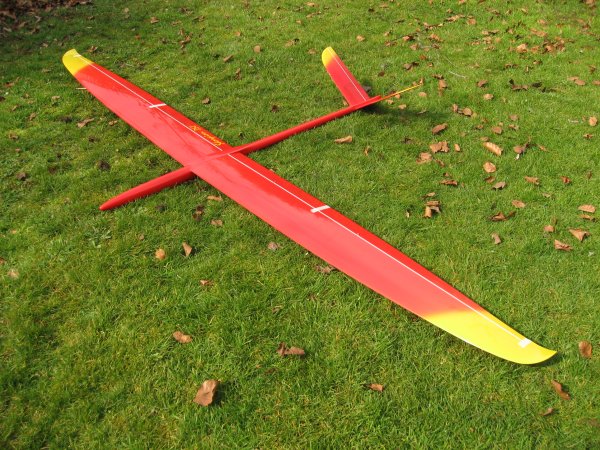
Wanted a big moulded glider for a long time, but put off by the expense -
then I saw mark southall flying his blue and yellow thing at the mynd.
Extremely impressed by the build quality, and the clean lines.
Extremely expensive at about £700 for the airframe alone.
Long waiting list, so plenty of time to save up.
Ordered mid november 2006 after a bit of research to decide which version
and colours to go for.
It went in the queue to be built to order.
Arrived late march 2007 - so that's about 4 months or 17 weeks, although that
does include xmas.
The finish is excellent and everything fits together snugly.
The reversal of the standard red and yellow underside stripes stripes I
requested (to make the tips yellow top and bottom) didn't seem to extend to the
servos covers.
I had to request yellow replacements - no problem.
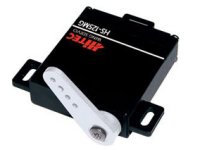
Before it arrived I bought a set of 4x hitec 125mg servos
to use in the wing.
These were designed from scratch to be used in thin wings.
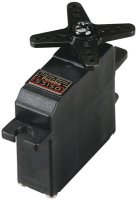
However, I also bought 1x futaba s3150 digital servo for
comparison.
These were the recommended fit and they are very good, with a different gear
ratio, swapping speed for more torque.
And the digital nature of them seems to make them a bit more positive at
maintaining their position, at the cost of current consumption.
No build info in the box, but a pdf was sent by email.
Also, there is a good run through here, and there
is knewt's page here.
Not sure where to start, I opened up the fuselage and tail cone to clear the control surface lever arms - unfortunately managed to split the tail cone and had to glue it.
Progress was a bit slow while I thought about it a lot and finished my last open university module to complete the diploma.
August 2007.
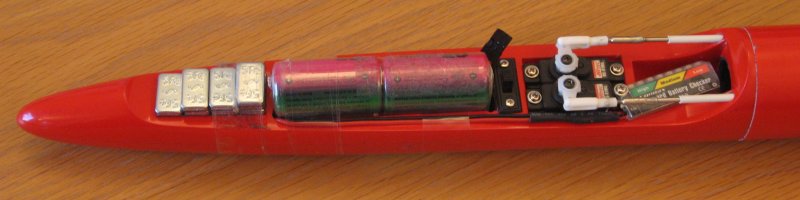
I had worked out that a 3700mAh nimh 4x cell should just about fit in front of
the servo tray and bought same.
Fitted 2x hitec hs81mg in the fuselage and connected up the
prefitted control rods.
They were already fitted with threaded ends that were just the right length to
fit a nylon clevis. I would have preferred to use metal, but that would have
meant cutting the rods down.
I eventually sliced the servo grommets so that the servos sit directly onto the
tray, as this makes the control rod runs more in line, and gives more
clearance, being closer to the widest part of the fuselage.
Fitted a standard power switch across the fuselage, directly in front of the
servo tray.
September 2007.
Dropped the 3700mAh pack in in front of the switch.
Managed to squeeze a hitec slimline dual conversion Rx up the front of the
fuselage, without having to cut it.
Fitted all the extension leads, taped them down, fitted an xtal and pushed it
up front to stay.
Hoping that the required nose weight could be fitted on top (actually
underneath, as the servos are upside down in the completed aircraft - all
rather confusing, but it makes sense for the control runs and the ballast
tube).
Connected up all 6x servos to the extension leads and set up a program in the Tx, getting the directions right etc.
Left the difficult bit to last.
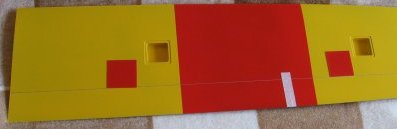
There seem to be lots of different ways to do the wing servos.
Eventually decided to go for 4x futaba s3150 digitals as
recommended.
The hitec 125mg are too big to go in the bays provided without removing the
mounting lugs, which rather defeats the point anyway.
Decided to go for the control rod on top method, totally enclosed.
This means using the 1st hole on the standard control horn, and filing away the
metal clevis to clear the servo hub at extreme forward travel.
Even then you need to carefully space the servo away from the base (top) of the
bay to give maximum clearence for the control rod.
This puts the servos as low as possible in the wing, just above the cover.
This is more tricky for the outer, aileron servos, where the wing is thinner.
I managed a screwless method of mounting, by making slots in the bay at front
and back for the servo lugs, sliding them into 1, then the other, and then
fitting balsa packing blocks to keep the servo in the middle.
Had to file down the servo lugs a little to get the servos as low as possible.
Rather alarming cutting into the upper surface of the wing for the control rod
run, having to cut through a white spacer inside the wing.
I found you don't need as long a slot as it says in the instructions.
Of course it needs to be just wide enough to clear the clevis.
Made the control rods from 2mm studding with a metal clevis on each end and a
single bend to clear the rear spar.
Made a drawing to reproduce the required angle.
Decided aginst fitting any covers on the top suface, as I think it looks quite
tidy (and better) without.
A lot of faffing about to get these running smoothly.
Next nightmare getting the servo leads threaded up the inside of the wing.
At 1 point I thought it impossible, but eventually managed it by poking a stiff
pilot wire up and then dragging the twisted extension leads along behind.
I had thought of using standard servo connectors and stuffing them inside the
wing, but this is really impractical every time the wings are fitted, and I
eventually used the wing connectors supplied.
Not easy getting 2x 0V and 4.8V power wires onto a single pin (each), but
eventually managed it and heatshrunk insulated.
I put some thin ply strips at the bottom of the connector sockets to space them
and make sure that they connect properly.
October 2007.
To get the balance right I had to remove the battery pack and fit 2 strips of
wheel balancing weights either side of it, inside the fuselage.
Still only just enough room to get the rest of the required weight on "top" in
front of the battery.
There is a still a bit of space in front of the Rx, but it is rather
inacessible.
Ended up 2.425 kg total.
Taking advice on the Rx aerial, I replaced the original with something much
longer, leaving lots dangling out the back of the tube going down inside the
conducting carbon fuselage.
Set up the controls to something sensible, mostly based on the instructions,
but with:
Only a little aileron mixed in to the flaps.
No flap mixed in to the ailerons.
No aileron differential as it would not help updside down.
No down elevator mixed in to crow braking.
November 2007.
Took it to the mynd.
Not much wind and slightly off direction for pole cott.
Did a range check with the aerial folded back up the outside of the fuselage
and pointing the retracted Tx aerial straight in line with the tail - seems
fine.
Despite much nervousness, got it launched into the breeze.
It flew straight out from the slope with no input required, as you might expect
from something built this accurately.
Did a few figure 8 circuits.
Brought it back up the slope a bit for the cameras, where there is less lift
and had to land it.
It feels quite heavy, even with no balllast, and flys fast, but it is very
smooth and easy to fly.
With no differential the aileron effect is very axial, with a bit of rudder
required to do coordinated flat turns.
My 1st aircraft with ailerons and a rudder (even if it is a v tail).
Anyway, a success, and didn't risk putting it up again in the marginal
conditions.
February 2008.
Took it to the mynd again.
Much better wind on pole cott.
Again, range checked it.
With more lift, I could throw it about a bit more.
It makes a nice quiet jet noise at speed.
Did a couple of loops easily.
A roll seemed rather slow - maybe need a bit more aileron mixed in.
Did several wide circuit landing approaches, finding that the switched in crow
braking mostly swapped speed for height.
Eventually got it down safely without the brakes.
Probably need some down mixing in, and to use the braking progressively on the
throttle stick, rather than full on/off.
Increased the aileron throw and reduced the flap drop to closer match the
aileron rise under braking to avoid the zoom effect.
But we just haven't had decent weather for necessary days in the summer of
2008.
Maybe next year.
| span | area | mass | loading |
| 2.9m | 56.8 dm2 | 2.425kg | 42.7 g/dm2 |
| in | ft2 | oz | oz/ft2 |